Automatic spam filtering
All submissions are automatically going through spam filtering system.
Providing field names
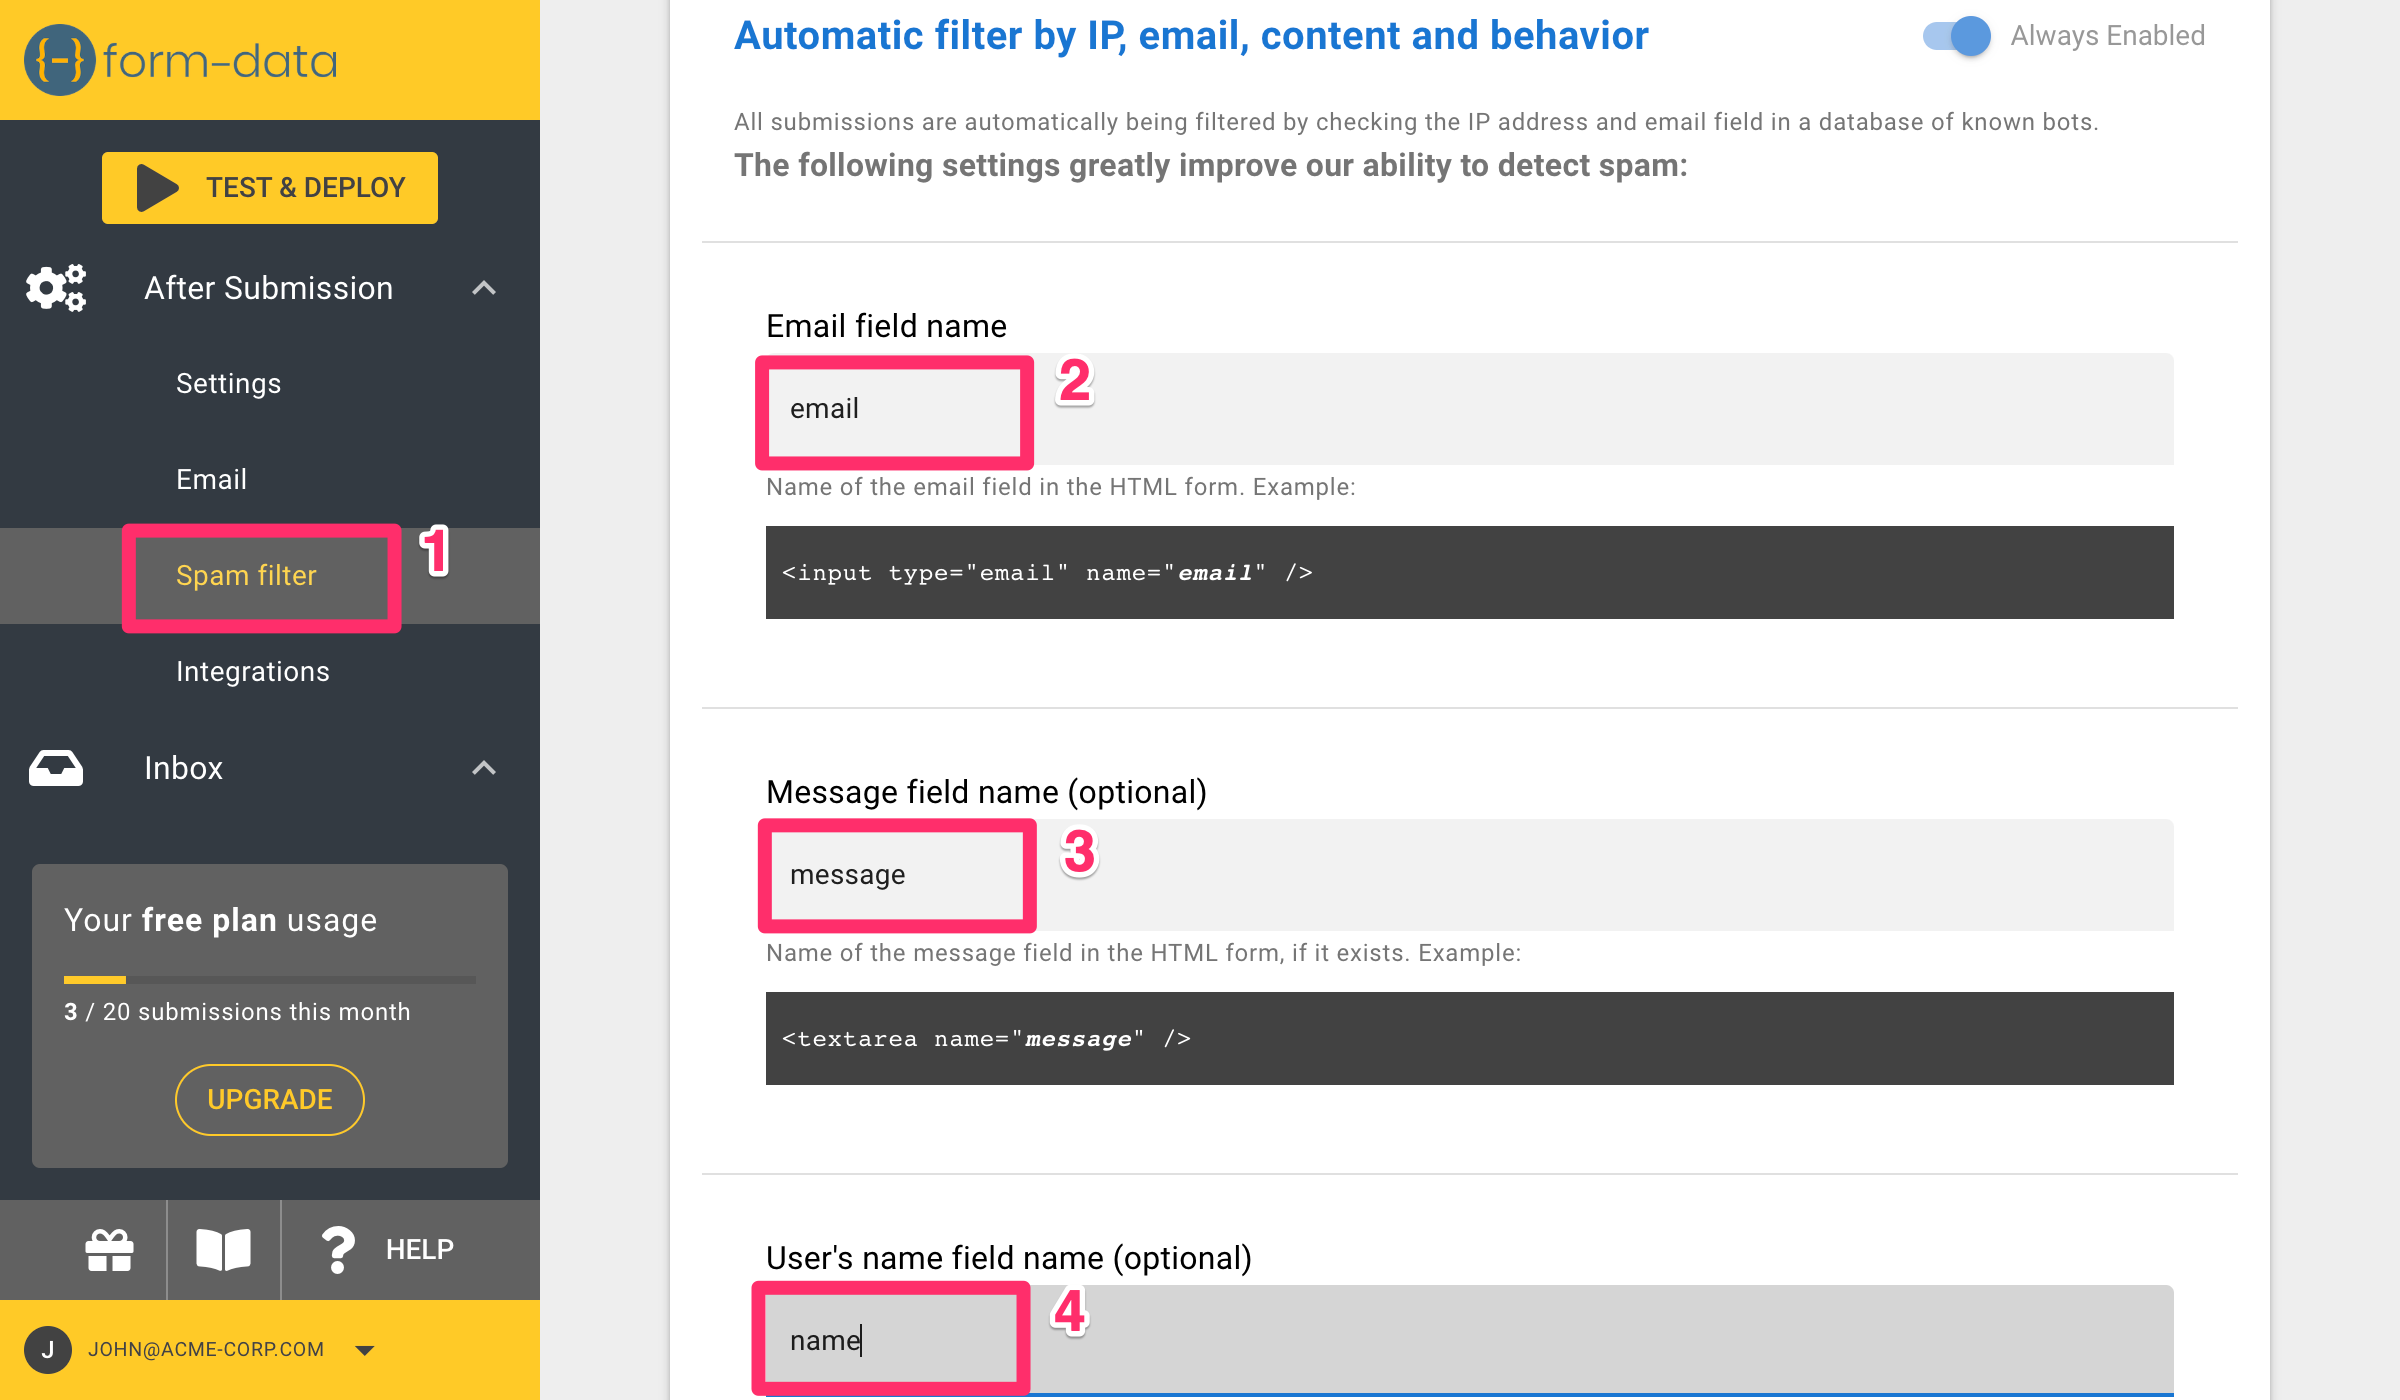
To improve the accuracy of the filtering algorithm, provide the names of the email, name and message fields of your form, if they exist.
For example, if your form looks like this:
<form id="contact" action="YOUR_FORM_HANDLER_URL" method="post">
    <input placeholder="Your name" type="text" name="name" required >
    <input placeholder="Your Email Address" type="email" name="email" required>
    <textarea placeholder="Type your Message Here...." name="message" required></textarea>
    <button name="submit" type="submit">Submit</button>
</form>
- Note the
nameattribute of the input fields in your HTML. - Go to Spam filter ⓵ and provide the names of the
email⓶,message⓷ andname⓸ fields as they appear in your html form. If you don't have such fields in your form, just leave this empty - Don't forget to save once you update each field

Add spam detection script
If you want to improve the spam detection rate even more, you can add a script to your page that will run additional checks on the client. The main tests that it runs are checking whether the browser supports javascript, and how quickly submissions are made. More tests may be added in the future.
This script does not have any effect on user experience
To add the script, follow these steps:
- Add the following
scriptto your site'sheadsection<script src="https://static.form-data.com/js/form-data-tools.v1.min.js"></script> - Add the following hidden field into the form that you'd like to protect. Add it exactly as you see here.
<input type="hidden" name="_fd" value="0" class="form-data-marker" /> - Add the following
scriptafter your form's closing tag<script>
_fd.scan()
</script>tipIf you are using a framework such as React or Vue, you will have to run this code after the DOM element with your form was rendered. For example, in Vue, you can do this inside the
onMountedhook