Quick start
Connect your first form, collect submissions, and get email notifications - in just a few minutes
Before you begin
Here is what you will need:
- A Form-Data account. You can sign up here.
- An HTML form. If you just want to test things up, you can use this codepen form.
Create a form endpoint in Form-Data
After you have signed up and logged in to Form-Data, follow these steps:
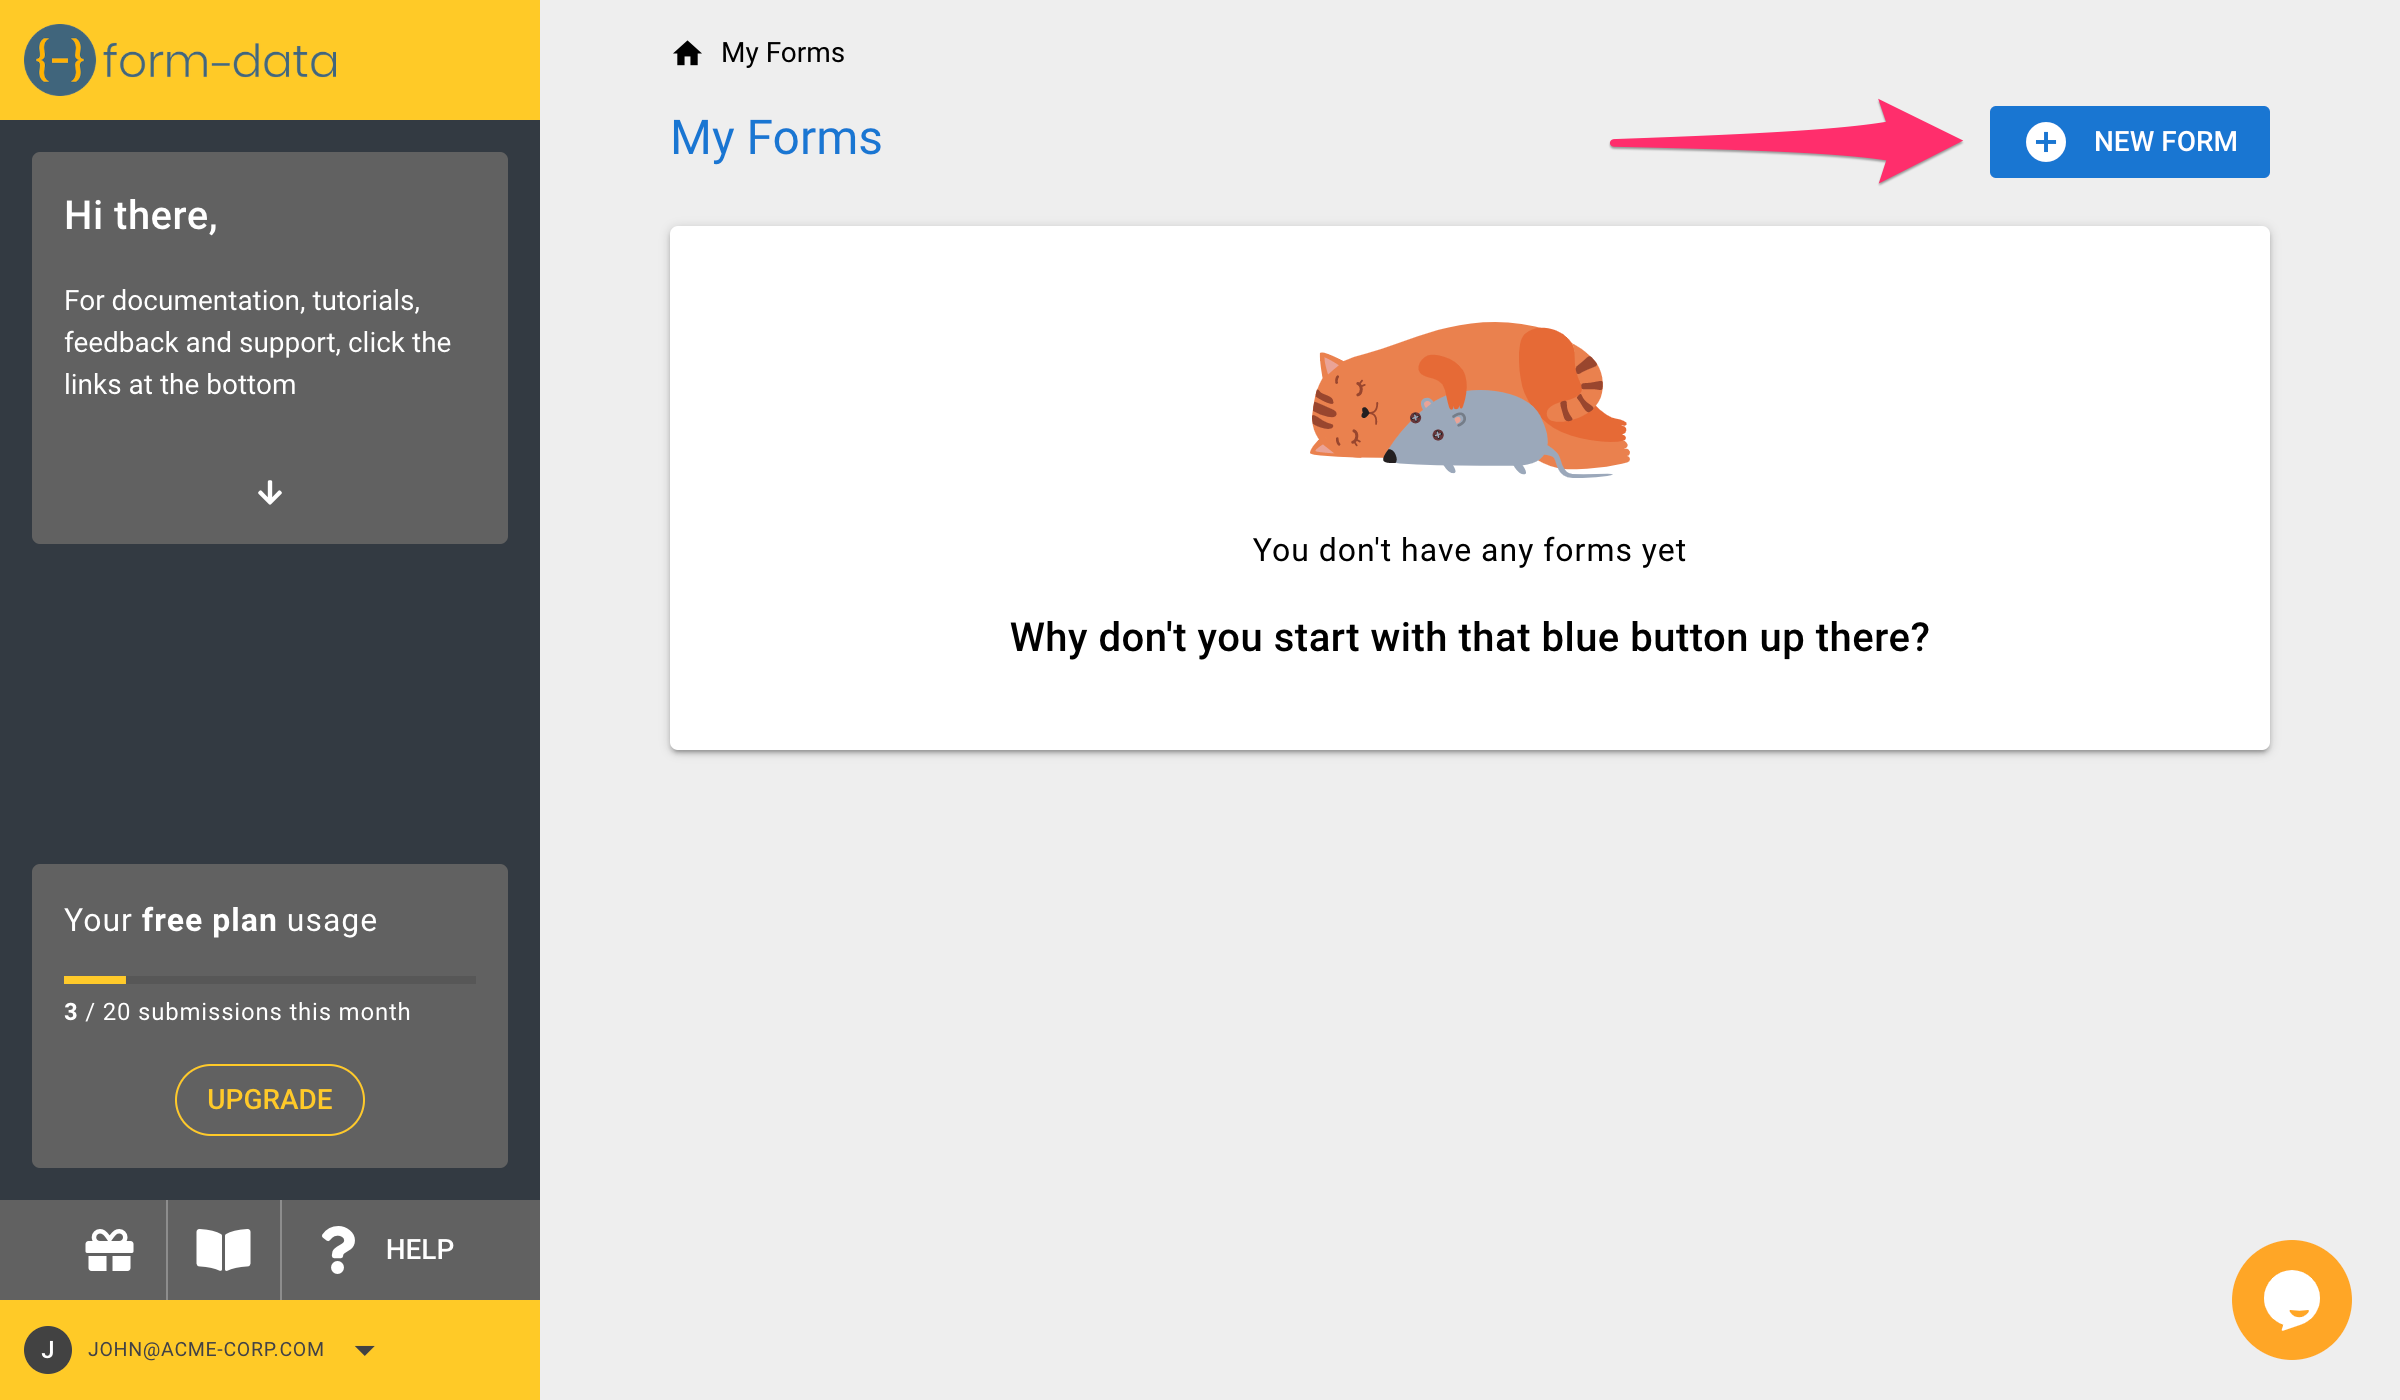
1. Click 'New form' button
After you've signed up and logged in to Form-Data webapp, click New form button
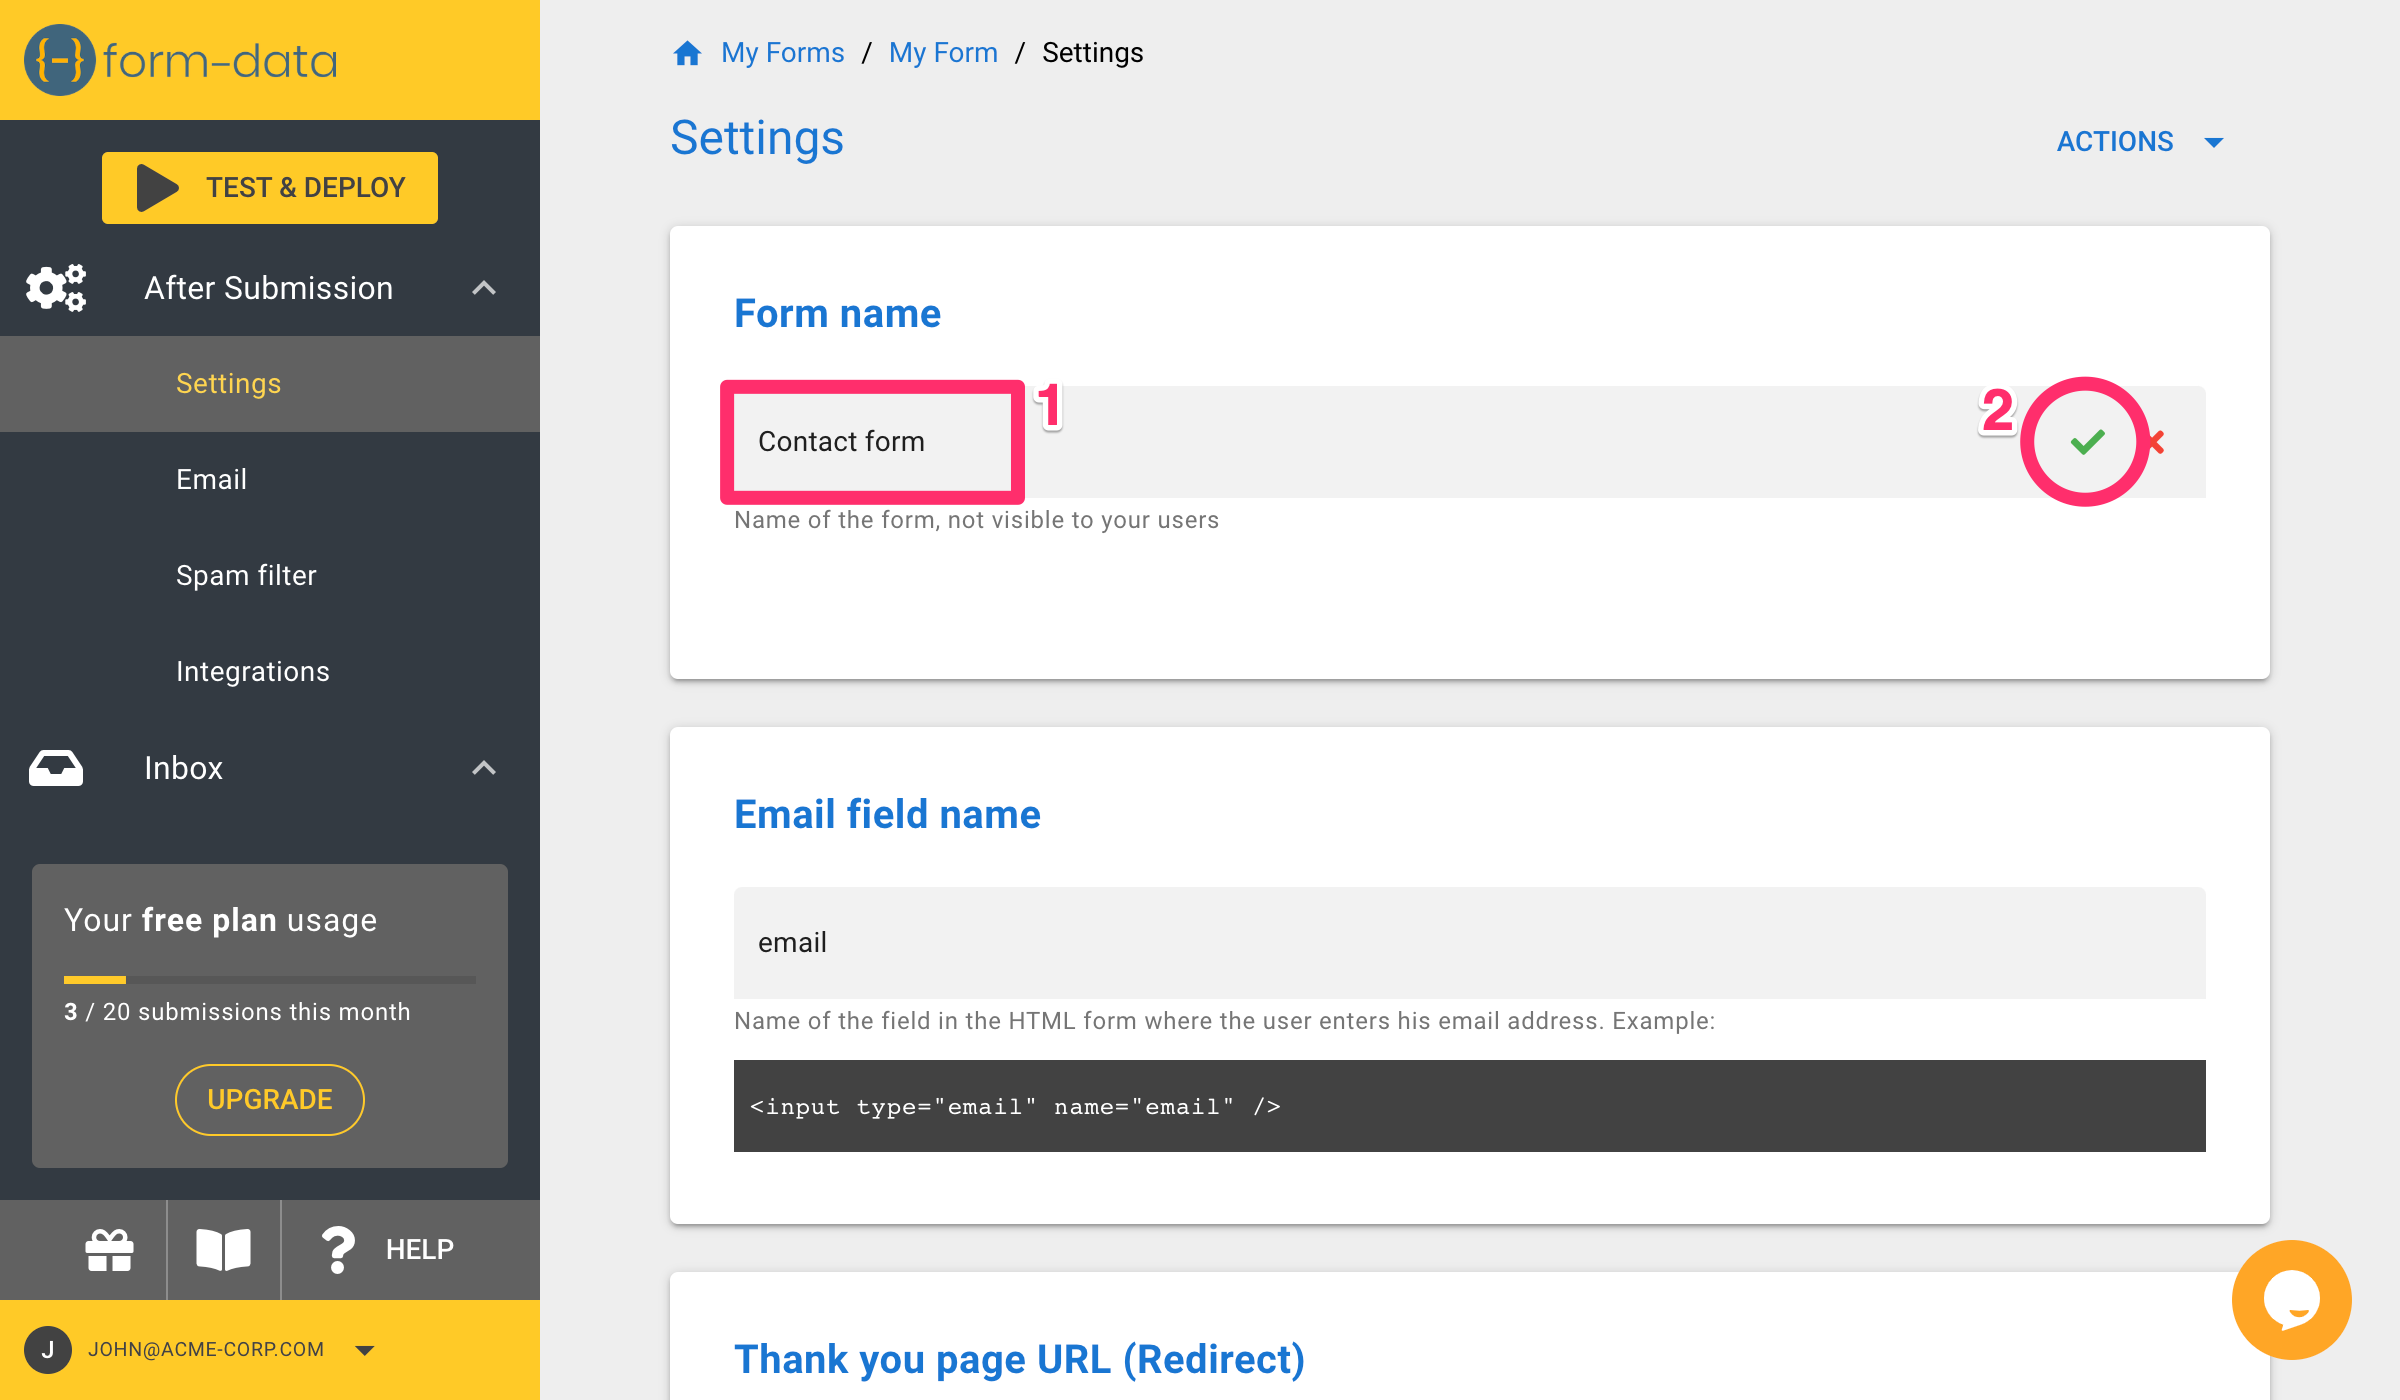
2. Name your form endpoint
- Give your form endpoint a name ⓵
- Click the checkmark ⓶ or press enter in order to save
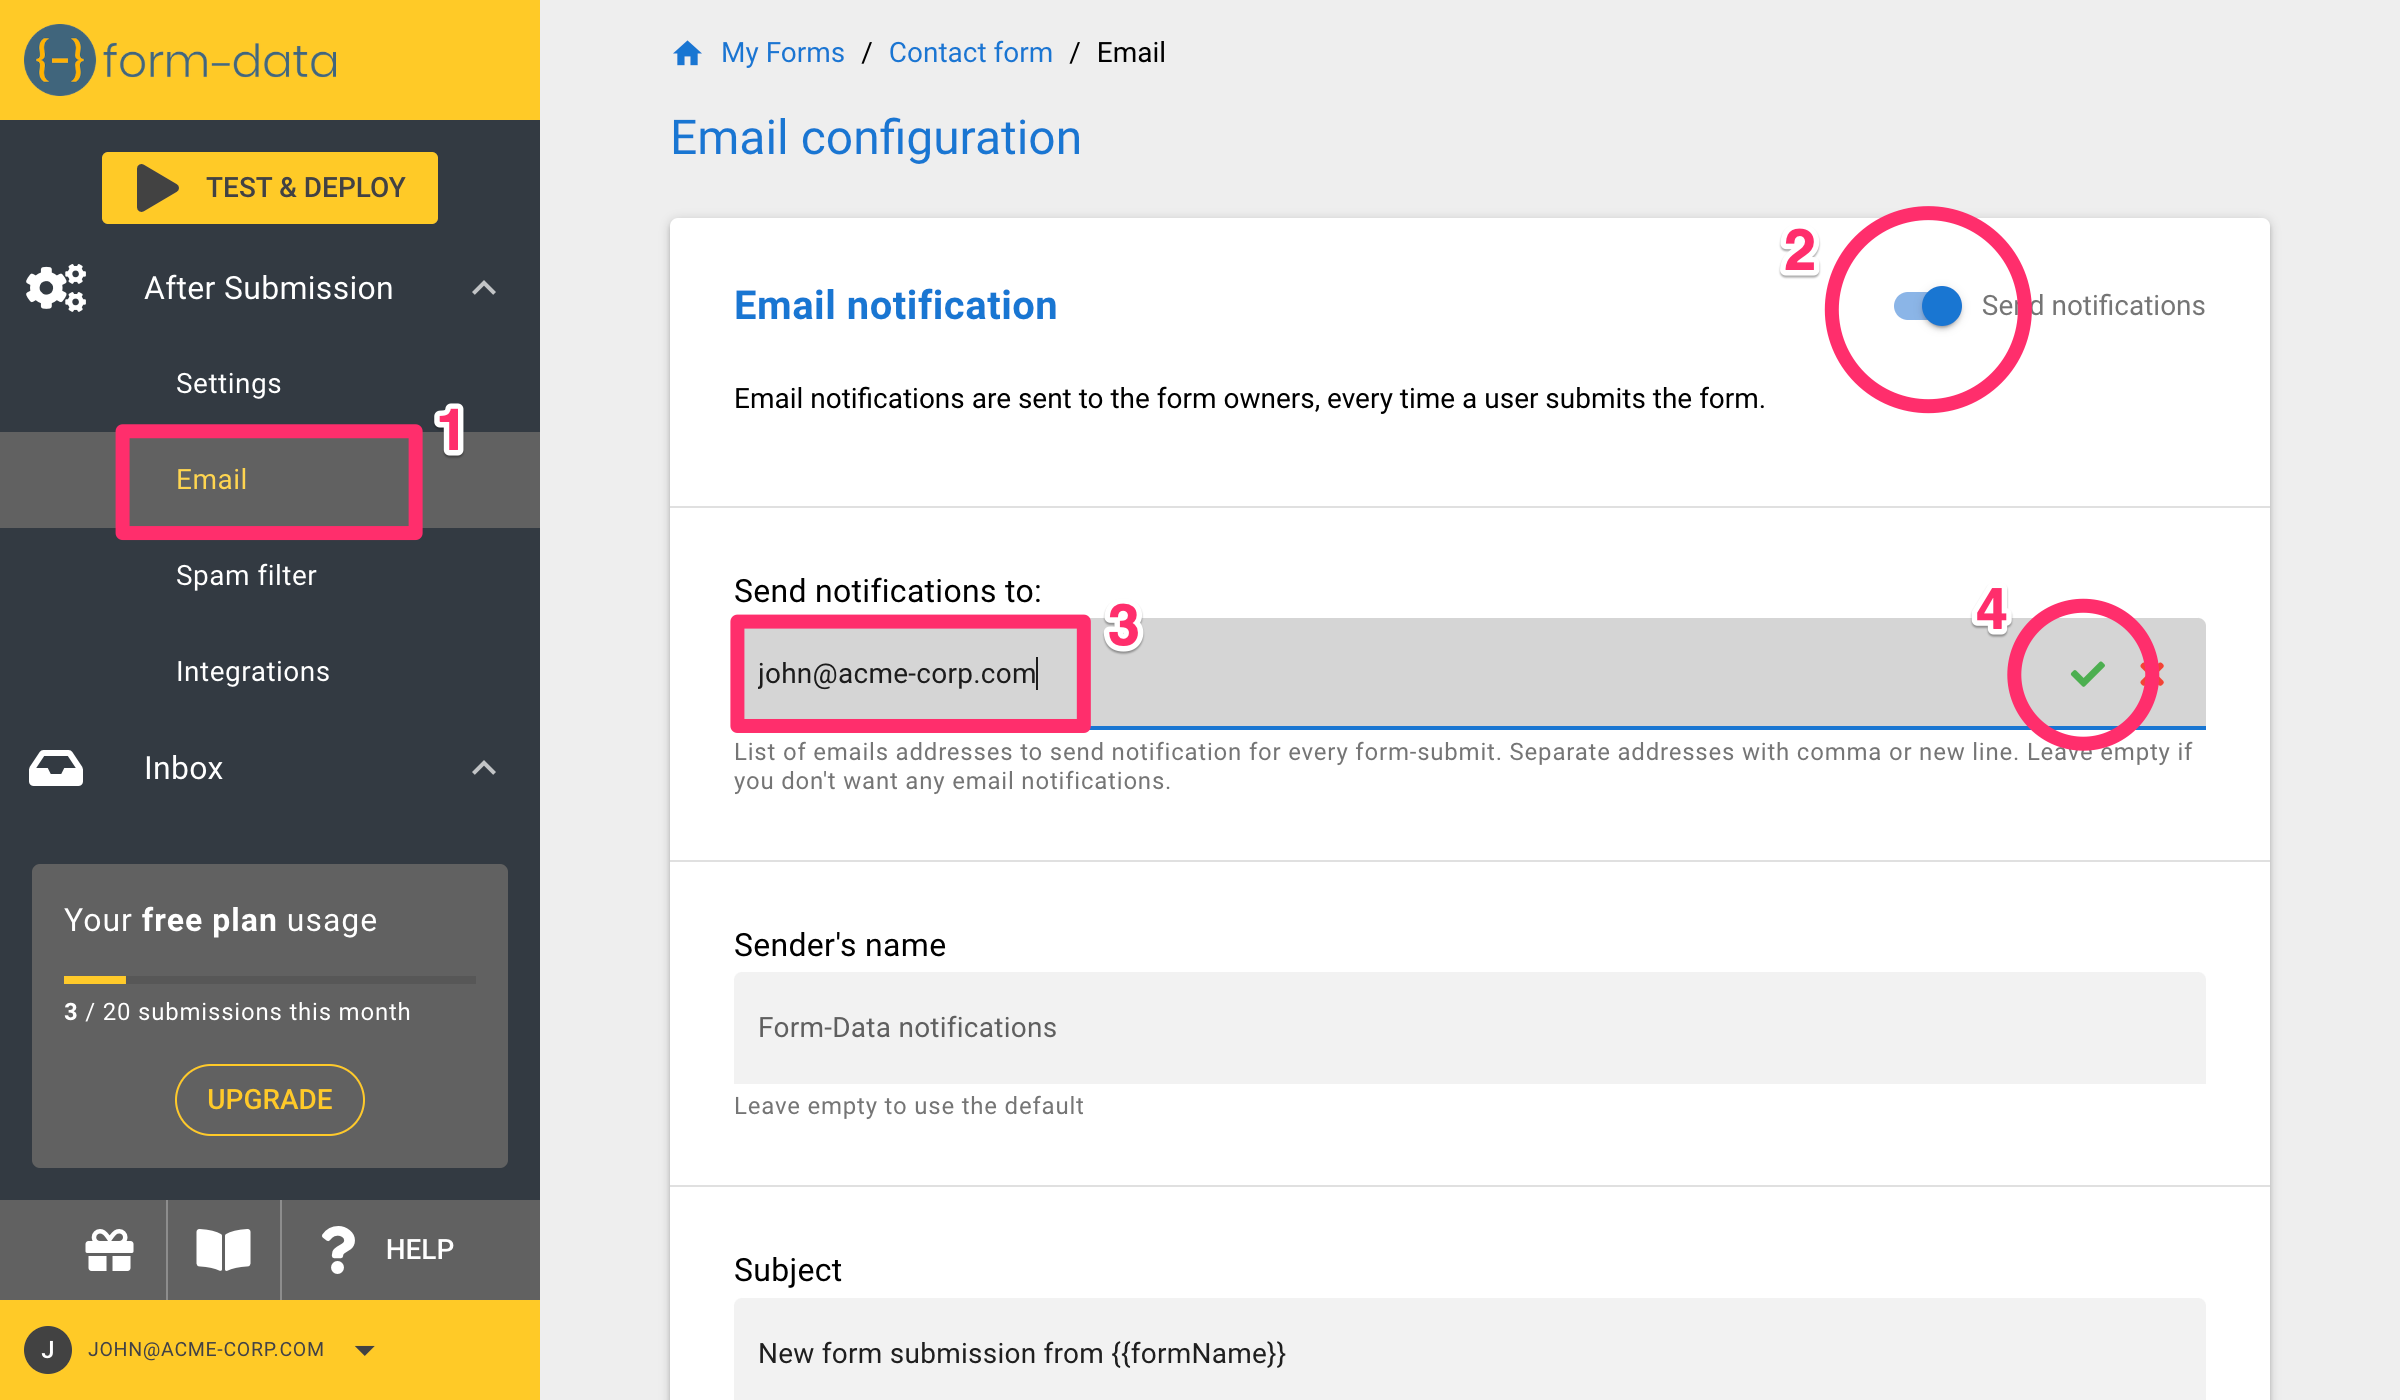
3. Turn on email notifications
- Click the Email menu ⓵
- Turn on the Email notifications toggle ⓶
- Enter your email address ⓷. You can enter multiple addresses separated by comma or enter.
- Click the checkmark ⓸ in order to save
4. Copy the form-handler URL
- Click Test & Deploy ⓵
- Click the Copy button ⓶. The URL will be copied to your clipboard
- Continue to the next step to see how to use it

Build your HTML form
- You can use plain HTML, or any frontend framework that you like, such as Vue, React, Svelte, etc. You can also use full-blown site builders such as Webflow.
- If you just want to test things up, you can use this codepen form.
- Or, you can just use the test form that is available inside Form-Data under Test & Deploy > Test form handler
Regardless of the stack that you choose, a form will essentially look like this:
<form id="contact" action="YOUR_FORM_HANDLER_URL" method="post">
  <input placeholder="Your name" type="text" name="name" required >
  <input placeholder="Your Email Address" type="email" name="email" required>
  <textarea placeholder="Type your Message Here...." name="message" required></textarea>
  <button name="submit" type="submit">Submit</button>
</form>
There are 2 important thing to note here:
- The form's
actionattribute. Paste your form's handler URL into theactionattribute, replacing the stringYOUR_FORM_HANDLER_URL. - Each field has a
nameattribute. This is the name of the field that you'll get inside Form-Data when the form is submitted.
Ta-Da!
That's it! You now have a fully functional form that can collect submissions and send you email notifications.
Read the rest of the documentation to find out about all the other features.